Introduction
One of the more common technical tools used by traders, the Bollinger Bands were created by John Bollinger in the early 80s. The tool was not intended as a technical analysis item for trading decisions, but its perceived utility for that purpose has made it widely popular in the ensuing decades. It is likely to be a part of any useful trading software, and is utilized both independently, and also as part of a general trading strategy by countless traders all over the world.
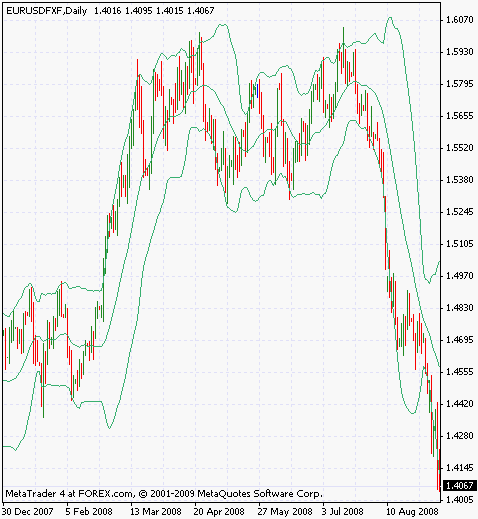
Note: Past performance is not indicative of future results.
Here we see a typical day’s price action analysed with the Bollinger Bands. We observe the contraction of the bands in the middle part of the chart, and on the left- hand side. In between, we observe the bands expanding as the violent up- and downward movements create great momentum in the market. The upper and lower lines are the standard deviations to be discussed below soon, while the middle line is the moving average often used as the signal line by traders.
Calculation of the Bands
The Bollinger Band consists of a moving average, and two standard deviation indicators superimposed on it. The standard deviation is used to determine how much the price diverges from the mean (i.e. how great the momentum is) for the ongoing market movement. Interested readers can refer to the related article on this website, but typically, the standard deviation will move away from the moving average in the middle when the price moves up or down with strong momentum.
More concisely, the Bands consist of
an N-period SMA, EMA, or smoothed moving average in the middle, depending on the choice
the upper Bollinger Band, which is an N-period standard deviation multiplied with a factor K, and added to the SMA value
the lower Bollinger Band, which is the same, but the standard deviation is subtracted from the SMA.
N and K can be determined by the trader. Typical values are 20 for N (the SMA and standard deviation period), and 2 for K. The K factor is used to make bands pronounced and easily observed.
Trading with the Bollinger Bands
There are many different ways of interpreting the bands. At its simplest form, (and also as advocated by its creator, Professor Bollinger) the bands are used to measure volatility. They expand when volatility is rising, and contract when it is falling. The bands are a good gauge of volatility with very easily identifiable visual patterns emerging as the market progresses through various phases. In addition, over the years traders have also improvised many different ways of using this indicator for trading decisions. One way is to buy or sell when the price action crosses the upper or lower band, respectively, anticipating a breakout, or a rapid movement of the price. Trades are closed when the price returns to the moving average in the middle. Another way to use this indicator is anticipating a reversal after long periods of low or high volatility. For example, a trader will enter a buy order in an uptrend after the bands remain close together for a long while, anticipating the next leg of the trend to commence soon. There are also many composite strategies using the Bands for anything from confirmation to signal generation for an incipient price phenomenon.
Accessibility
Just about any trading platform will come equipped with the Bollinger Bands since it is so popular among traders. The MetaTrader 4 platform, DealBook of GFT Forex, FXCM Trade Station all provide this indicator, as well countless others not mentioned in this article.
Conclusion
Bollinger Bands serve two purposes. They depict market volatility in an easily identifiable form, and they also help us in trading decisions. The creator of the indicator does not claim that the Bands predict anything about future price action, but that doesn’t prevent the indicator being very popular in that role. It is, of course, up to you to decide in which way you’ll be using the Bands,